Wednesday, October 7, 2015

Our reward system for school

After the Years of homeschooling I have come up with our fuzzy rewards.  K likes to earn rewards; so after much  thought I came up with the fuzzy reward system.


I came across some sparkly fuzzy's from Michael's for under a buck from their summer clearance 2 years ago.  Snagged those right up!  I store them in a plastic bin from the Dollar tree and added a label. We don't have any issues on son getting into the Fuzzys.
When son is on task, or I notice him doing something kind that wasn't asked of him he is rewarded with fuzzy's. Get's a 100% is a 2 point fuzzy.  He has lots of ways of earning fuzzy's daily but there are also ways to lose them.


Once a week I bring the school store out.  Everything in the store are things that I find on clearance or toys that son would enjoy.  With the store son is learning the skill of saving vs spending.  There are a couple of high point  rewards that are there to encourage him to save for.

The reward box is were I put small ticket items that don't take much to earn.  Things like specialty pencils, erasers, smelly markers and small candies.
We have things such as small Minecraft toys, Lego mini figures, Mixels etc.  The store is always being added to as I see fun rewards to encourage.

I think Im teaching him that with hard work there isa payout.  We don't use money for school work that's a whole another post.

How I put points on an toy -
I go mainly by the price that I paid for the item.   pencil is 1 point, something that was $1.00 is 5 Pts.  Like Minecraft toy/Lego mini figure is 20 points. Mixels ar 30 points, we also have special time with parent of choice by self for 50 points, go out to dinner with parent of choice is 75 pts. Movie tickets etc. As son ages the rewards of course will change and pts will go up.  The system is only here to encourage and just for fun.


Wednesday, April 2, 2014

Valentines Day 2014

 
Valentines day 2014
 
 
The day started with K waking up and receiving his valentines day gift from mom and dad in his chair backer.  the backer is from Pottery barn kids if your wondering.
Once K was ready to eat we made heart shape pancakes and eggs and strawberry milk.  K said it was the best breakfast ever.  Ha he says that to any meal that is made for him.  Just love his kind heart. 
Once we got some school work done K and I baked some cupcakes to decorate.  Red velvet with cream cheese frosting.  Than we went onto some art where K was learning how to make a heart stencil and how you would paint with a stencil. 

K said his favorite thing of the day was EVERYTHING!  He enjoyed the non-stop fun through out the day weaved within his normal school day.

FT: Marineland 3/7/14

Marine Land
Palm Coast FL
 
This trip was AWESOME! other than the 48 degree weather
 
The trip started out with learning about Bottle nose dolphins in the classroom.  We learned about the parts of dolphins and what they eat to the noises they make.  The classroom learning was about 20 Min's.  Once we finished the class we got to spend sometime just watching the dolphins play with each other and the kids at the windows.
 

Nellie was happy to see us.  She is 60 yrs old and doing awesome.   Did you know that dolphins shed their outer skin every 2 hours?  That's why dolphins feel the way they do. 


Its our time with some one on one time with the dolphins.  Our group spent time with Shocka and Hemingway.  Hemingway is 20 yrs old and Shocka was 2 yrs old.  We learned a couple of commands to do with the dolphins. We got to feed, dance and get up close with the dolphins.  Loved the hands on part as now we got to see things that we learned in the classroom up close.
 
Part of our group added the behind the seas tour and that was where we all learned about the other sea life that marine land was working with.  We also got to learn the history of marine land which started off with a dolphin named FLIPPY!  Yes, that sounds sort of like a famous dolphins name.  Yup the writer got the idea from Flippy!

This field trip is by far our favorite field we've taken and we've been on some awesome trips.

We've learned so much about Dolphins in general and dolphins right here in our own back yard.  Teaching us how things like run off from our yards can damage our eco system.  Dolphins in the Indian lagoon are only averaging a life span of 7 yrs when a wild dolphin not in the lagoon are averaging 30 yrs.

Monday, December 16, 2013

Legoland 2013

Our Journey through LEGOLAND in photo's
 

K and I had the chance to go to LEGOLAND with our homeschool group again.  I kept this a secret until The 6 AM wake up call.  K jumped for joy with the surprise!

Look at this amazing Christmas tree made from Legos.


 K was living up the chance to go on rides with his friends!  Sometimes being an only child is BORING! 

                      
                                                  Merry Christmas from K and Mrs. Moliassa

Sunday, December 15, 2013

Enjoying the Fall with Friends

Back in November K and I made the trip to Tavares FL to ride the Orange Blossom train.
We had a great time with some of our friends.
 

 Just love this photo of K and N looking out the back of the train.

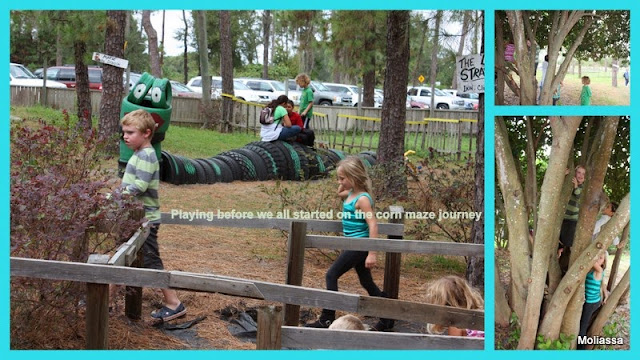
After the train ride we headed for the corn maze.   While we waited for everyone arrive the kids played in a small maze and climbed a tree.

Here we are heading into the corn maze!  Our team meant some serious business.


We Made it out of the maze with all kids.  I call that a success!

After the maze the kids played on this huge air pillow.  K loved that thing!

Monday, November 4, 2013

Art Lesson: Watercolor Apples!

Art Lesson:  Watercolor Apples!
 
Supplies needed:
Water colors with a brush
Cup of water (if needed with your water colors)
Black or brown oil pastel
A sheet of paper


I started the art project with explaining about different perspectives of a given subject.
Todays lesson is on the perspective of the birds eye view.  I placed an apple on a plate and had son stand on the chair and describe what he saw.  One thing he notices was the shadow at the bottom side of the apple.
 
If child doesn't see it, this is your time guide them.  The younger bunch may need you to guide them through the lesson a little more.


Next, I presented all the supplies to Son and explained that we need to draw a plate on our paper.  Using oil pastels over a pencil helps child to think BIG.  Before I let Son draw, I explained to him that we are going to need room for 3-5 apples on his plate.  With that info, he drew a fairly large circle instead of his normal tiny circle (think of a dime) on a big paper.
 
 
Now I had Son water color the table or background.  You might want to guide them away from using really dark colors or colors of apples that are similar, in case they want an apple on the table as well.   Just let them go.  It's ok if they get some on the plate this is their project.

 
Now we talked about different colors and shapes of apples before moving on.
Son wanted 4 apples!
Now you will want to have them make a fist so they can see how big their fist is.  At that point you want to tell them that their apples need to be that size or bigger.  Again this is to help with not getting super small apples. 
Which at this point it just looks like circles on paper.  They can put their apples where ever they feel like this is their art.

 
Now we want to add some dimension by adding the shadow that was seen while we were looking down at the plate of apples in the beginning of the lesson.  You will want to guide child to basically add a smile at the bottom of the apple with a darker color water color.  We used Black!  It doesn't matter if its a thick or thin shadow.
 
When we got to the point we talked about how the shadow was formed.  I have a 3rd grader so this was a concept that was easy for him to understand.  For a younger child you might want to show them more examples to touch upon the concept of shadows and how they are formed.
 
Now your going to let them dry for a little while.


Now that your apples have dried for a little bit its time to add the stem.  Start with having all the shadows facing towards child.  Now your going to add a smile in the middle of your apple.  Once your apple is smiling go a head and add the stem.  Repeat on all your apples and enjoy your (their) art work. 


This General Idea came from here
 The lesson plan and photo's are MY work so please give credit back to my blog please.

Saturday, November 2, 2013

Unit Study: Apples

Apple Unit!
September
 
We started out by matching apples to the chart using the stickers on the apples. 
 100% WA apples used!!!!

Getting ready for the taste test!  Slices are ready to go.
I was taste testing along with K so there isn't any photo's of the tasting.


while testing all the apples I had K describe each apple as he sampled them. 
K's favorite apple ended up being the red delicious and Gala
My favorite was the honey crisp.
 
least favorites:
K- Granny smith
Mom- Red delicious
 
After the taste test I showed K the apple star.  He thought that was pretty neat.
 
 
For art we water colored a plate of apples.
(Art Lesson posting Monday 11/4)


We labeled the parts of an apple and colored. 


While reading one of our apple books we learned some neat things about apples  . Did you know a see from a gala apple may not sprout a gala tree.  In order for farmers to make sure their orchard grows the tree they want they cut trees down to a root stock and graph branches of the type of tree they want.
 
We learned how to graft using toothpicks. tape and a TP roll made to look like a root stock.  Not an easy thing for little hands to do by them self, but great visual for kids.


Books we used:
Apples By: Jenne Simon (Science reader)
Apples By: Jacqueline Farmer <--great 1st-4th="" book="" for="" grader="" p="" the="">
Picking Apples and Pumpkins By: Amy and Rickard Hutchings